This chapter describes the creation of a Eclipse plug-in fragment to change the default configuration of Checkclipse. No Java programming is needed for this. It is just configuration work.
Alter the default configuration of Checkclipse.
The following configuration settings can be altered:
The Checkstyle configuration.
The file filters.
The use of the project classloader.
Automatic builds on configuration changes.
Appending the Checkstyle check name to diagnostic messages.
Using the project directory as Checkstyle basedir.
The fragment can contribute additional jars with Checkstyle checks.
See the reference documentation for a exact description on how to alter the configuration.
Contributing additional jars with Checkstyle checks.
The fragment can also contain additional jars with Checkstyle
checks. This jars have to be placed in a directory called
extension-lib. They are than picked up automatically and
the contained checks are available to Checkstyle.
For the example we want to achive the following:
a custom default Checkstyle configuration.
the name oft the violated Checkstyle rule should not be appended to the Checkstyle message.
a Jar file with custom Checkstyle checks should be available to Checkstyle.
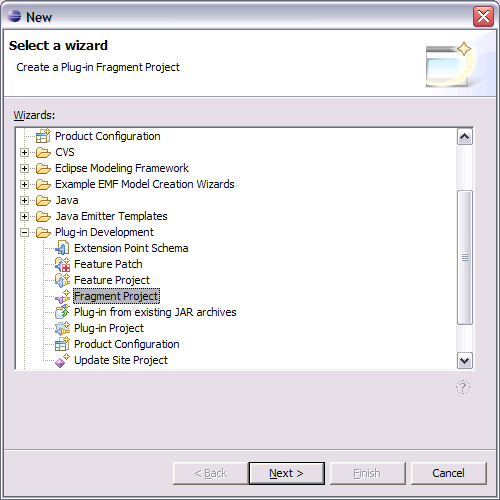
Select "File" -> "New" -> "Project". Now select the wizard "Plug-in Development" -> "Fragment Project".
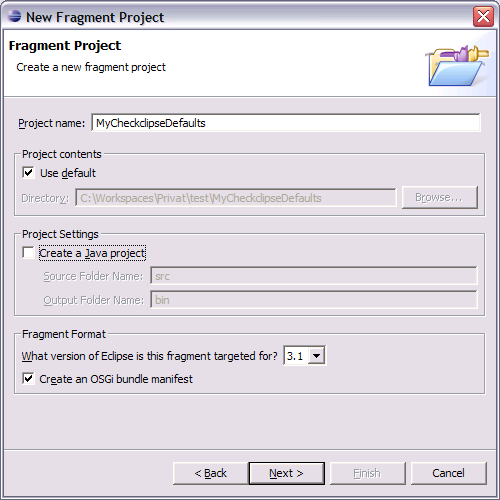
On the next page enter a name for your project. Don't forget to disable "Create a Java project".
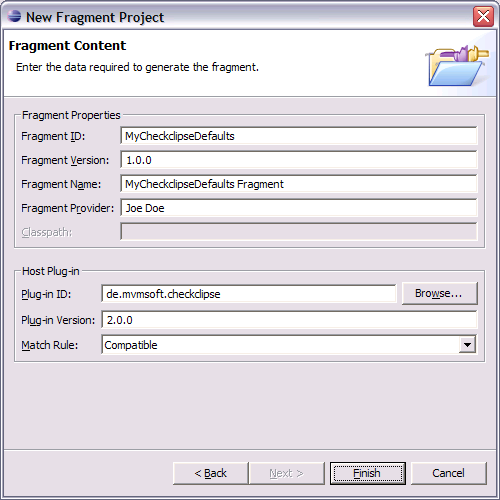
Now enter the fragment properties. You should choose a unique name for the "Fragment ID". If you just create the fragment for yourself something like "MyCheckclipseDefaults" should be ok. If you want to distribute the fragment you should choose something like "com.example.CheckclipseDefaults".
Then choose the plug-in this fragment should be associated with. Hit the "Browse" button and choose "de.mvmsoft.checkclipse". The plug-in version is filled in automatically. Choose "Compatible" as Match Rule.
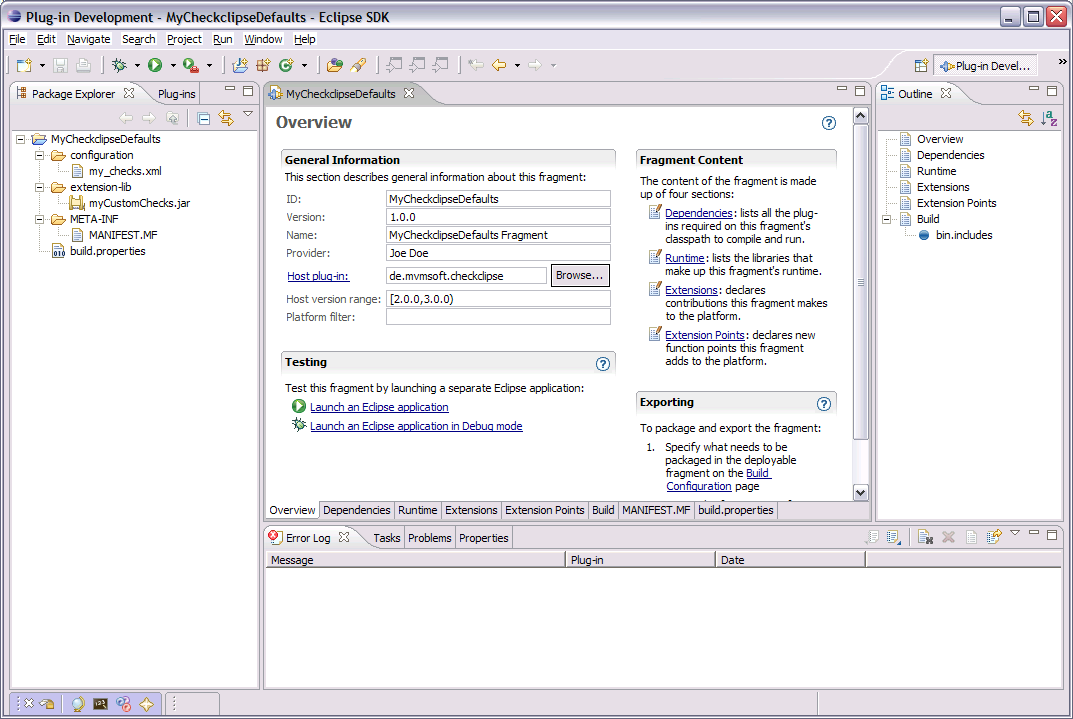
After you clicked "Finish" a new project is created in the workspace.
We now prepare this project for the next steps.
my_checks.xml to the newly created directory
configuration.For our own custom checks, we create a directory called
extension-lib (Use exactly this
name!) and copy the jar to it.
Now our workspace looks like this:
After we created the new plug-in fragment and copied the needed files to it, we can now do the configuration.
First change to the tab "Extension".
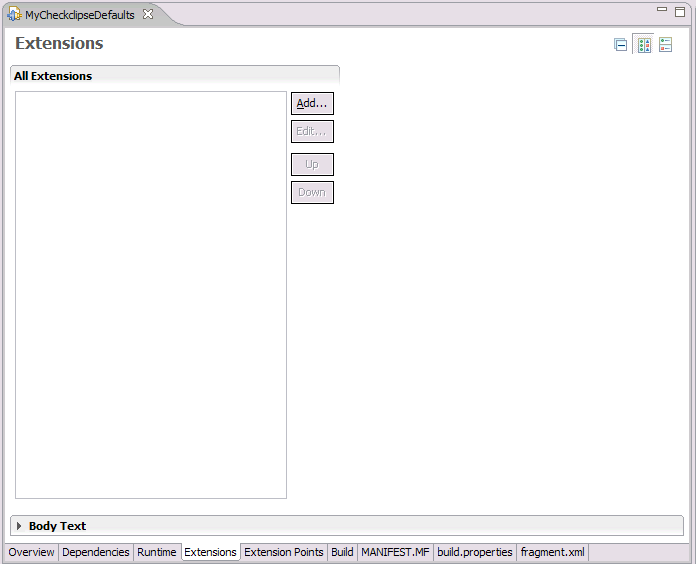
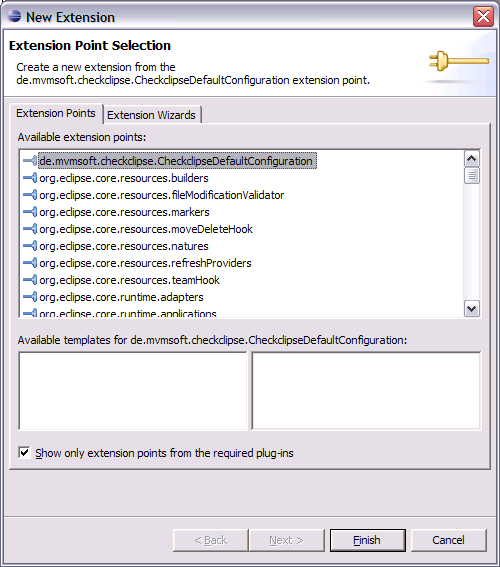
Press the "Add"-button to open up the extension point selection dialog. Choose "de.mvmsoft.checkclipse.CheckclipseDefaultConfiguration" and press "Finish".
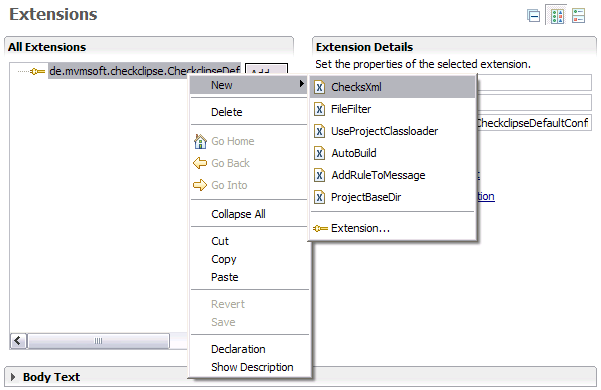
Back on the extensions tab right click on "de.mvmsoft.checkclipse.CheckclipseDefaultConfiguration" and select "New" and then "ChecksXml".
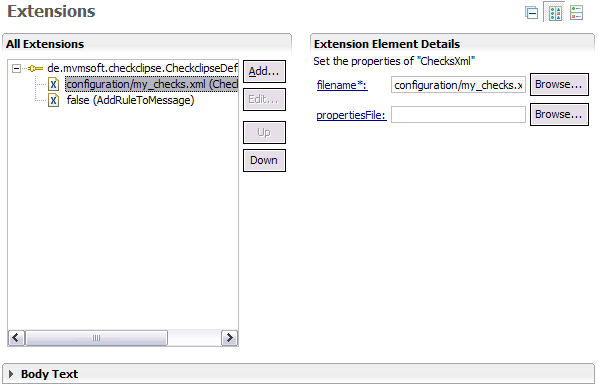
Hit the browse button behind the input field
"filename" and select the the file
configuration/my_checks.xml.
Then right click again on "de.mvmsoft.checkclipse.CheckclipseDefaultConfiguration" and select "New" and then "AddRuleToMessage". On the right side select the value "false".
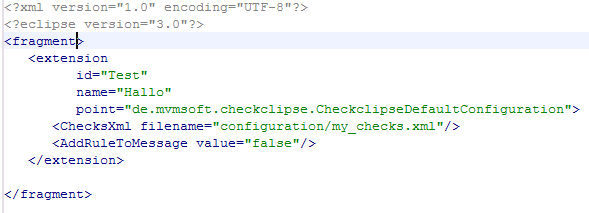
The configuration is now done. If you change to the tab "fragment.xml" it will look like this:
The first thing we need now is a Ant build file. Eclipse provides a tool to create this file automatically.
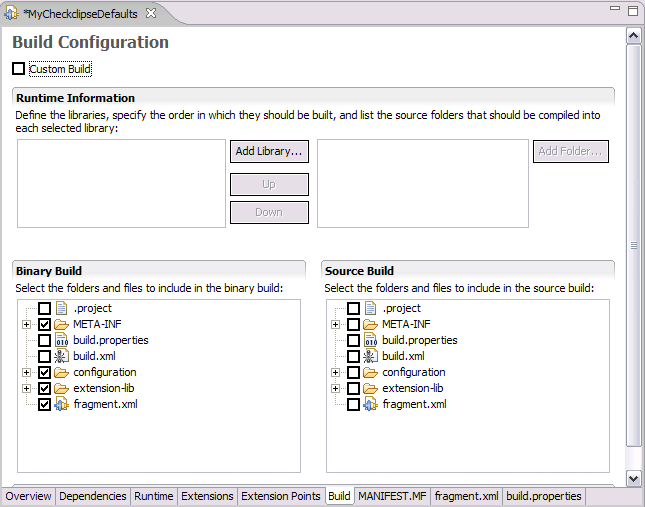
Before we can use this tool, we have to state which files an directories should be included in the fragment. To do this change to the tab "Build" and select the needed files:
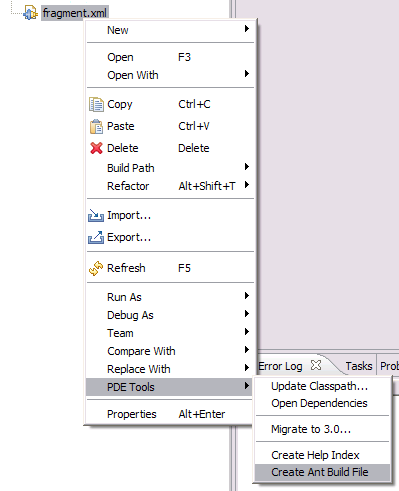
Now Eclipse knows enough to create the Ant build file. To create
it right click on the file fragment.xml and select
"PDE Tools" and "Create Ant Build File".
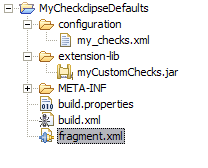
The file build.xml is created and the content of your
project should now be:
Right click on build.xml and select "Run As"
and then "Ant Build ...". This opens a dialog where you
can select the target for the build. Select "zip.plugin"
and hit "Run". This will create the file
MyCheckclipseDefaults_1.0.0.zip in your project directory
(you might need to refresh the project to see it). This file should
have the following content:

Now you can install this fragment like a normal plug-in.